How Elite draws text on-screen by poking character bitmaps directly into screen memory
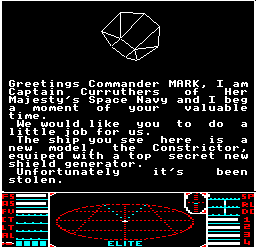
There is a lot of text in Elite, so much so that it needs to be compressed (see the deep dive on printing text tokens for details). But how does this text make it onto the screen, as in this wordy example from the Constrictor mission briefing?
For starters, Elite doesn't rely on the operating system to draw text; indeed, Elite uses hardly any operating system routines at all, choosing instead to implement almost everything itself in the search for speed and efficiency. In the main game code for the BBC Micro cassette version, there are just three calls to OSBYTE, two to OSWORD and one to OSFILE, and that's it for operating system calls. (For the curious, the OSBYTE calls flush all the buffers, read the joystick, and enable/disable BREAK and ESCAPE; the OSWORD calls read a line from the keyboard, and make a sound; and the OSFILE call saves or loads the commander file... and that's all.)
It's no surprise, then, that Elite has its very own text drawing routine at TT26 that pokes text directly to the screen, rather than relying on the standard OSWRCH command (which would probably have issues with the custom screen mode anyway). This deep dive looks at how this text-drawing routine works in the BBC Micro version; for details of how the NES version draws text using fonts and tile-based characters, see the deep dive on fonts in NES Elite.
The text cursor
---------------
The text printing routine at TT26 has a lot in common with the PIXEL routine described in the deep dive on Drawing monochrome pixels in mode 4, not least of which is the calculation of the screen address where we need to poke our text. The PIXEL routine starts with pixel x-coordinate and y-coordinates for the pixel to draw, but for text, Elite maintains a text cursor in locations XC and YC:
- XC is the x-coordinate of the text cursor (i.e. the text column), which can be from 0 to 32. A value of 0 denotes the leftmost column and 32 the rightmost column, but because the top part of the screen (the space view) has a white border that clashes with columns 0 and 32, text is only shown in columns 1-31.
- YC is the y-coordinate of the text cursor (i.e. the text row), which can be from 0 to 23. The screen actually has 31 character rows if you include the dashboard, but the text printing routines only work on the top part (the space view), so the text cursor only goes up to a maximum of 23, the row just before the screen splits. A value of 0 denotes the top row, but because the top part of the screen has a white border that clashes with row 0, text is always shown at row 1 or greater.
When TT26 is called to print a printable character, it prints it at the text cursor location, and increments the XC cursor value to point to the next character along, so repeated calls to TT26 will print characters one after the other.
Character bitmaps
-----------------
So we have an on-screen cursor position where we want to print a character, but how do we know what to print? For that, we need a character definition in the form of a bitmap.
Note that this only applies to printable ASCII characters in the range 32-95, as other characters don't have a screen presence; character 7, for example, emits a beep, while character 13 is a carriage return, which we can implement by moving the text cursor without having to print anything. This deep dive is only concerned with drawing printable characters, though the TT26 routine does cope with all character types.
The first step, then, is to get hold of the bitmap definition for the character we want to draw on the screen (i.e. we need the pixel shape of this character). The BBC Micro's MOS ROM contains bitmap definitions of the BBC's ASCII characters, starting from &C000 for space (ASCII 32) and ending with the £ symbol (ASCII 126), so this is where we need to look.
(Note that in the 6502 Second Processor version, to save time looking this information up from the MOS ROM each time, a copy of these bitmap definitions is embedded into the source code at page FONT%, so page 0 of the font is at FONT%, page 1 is at FONT%+1, and page 2 at FONT%+3. The rest of this deep dive talks about fetching the bitmaps from ROM, but for the 6502 Second Processor version, we actually fetch them, from FONT%.)
There are definitions for 32 characters in each of the three pages of MOS memory, as each definition takes up 8 bytes (8 rows of 8 pixels) and 32 * 8 = 256 bytes = 1 page. So:
- ASCII 32-63 are defined in &C000-&C0FF (page 0)
- ASCII 64-95 are defined in &C100-&C1FF (page 1)
- ASCII 96-126 are defined in &C200-&C2F0 (page 2)
The code starting at label RR1 in TT26 converts the ASCII code of the character that we want to print into the correct location in ROM, so when we come to poke values into the screen, we know what to poke. So now we just need to work out where to poke the character definition that we just tracked down.
Converting rows and columns to screen addresses
-----------------------------------------------
The next task, then, is to convert the current text cursor location from columns and rows into an address in screen memory.
This part of the process is very similar to the PIXEL routine described in the deep dive on Drawing monochrome pixels in mode 4. As each on-screen character is 8 pixels wide, and the special screen mode Elite uses for the top part of the screen is 256 pixels across with one bit per pixel, we can simply multiply the text column number by 8 to get a value that is not only the screen address offset of the text cursor from the left side of the screen, it's also the least significant byte of the screen address where we want to print this character, as each row of on-screen pixels corresponds to one page.
To put this more explicitly, the screen starts at &6000, so the text rows are stored in screen memory like this:
- Row 1: &6000 - &60FF for YC = 1, XC = 0 to 31
- Row 2: &6100 - &61FF for YC = 2, XC = 0 to 31
- Row 3: &6200 - &62FF for YC = 3, XC = 0 to 31
and so on.
Now to work out the most significant byte of the screen address. As already mentioned, in Elite's square mode 4 screen, each row of text on-screen takes up exactly one page, so the first row is page &60xx, the second row is page &61xx, so we can get the page for character (XC, YC) by OR'ing with &60. To see this in action, consider that our two values are, in binary:
  YC is between:  %00000000
            and:  %00010111
         &60 is:  %01100000
so YC OR &60 effectively adds &60 to YC, giving us the page number that we want, which is the most significant byte of the screen address of the character we want to display.
Poking into screen memory
-------------------------
We now have the address where we need to poke our character, and we have the bitmap that we want to poke, so it's finally time to draw the character on-screen. Luckily, this is relatively straightforward, because the BBC Micro splits its screen mode up into character blocks, each of which is 8 bytes wide (see the diagram in the deep dive on Drawing monochrome pixels in mode 4 for details of the screen memory structure). We only want to display characters according to this same grid, so we simply need to poke our 8x8 character bitmap into the character block pointed to by the screen address we calculated above. (It would be a much trickier proposition if we wanted to display characters anywhere on-screen, rather than in alignment with the standard screen's character block, but Elite doesn't need this kind of flexibility.)
For the monochrome mode 4 screen in cassette and disc Elite, poking into this location is a simple case of extracting each of the 8 rows from the character bitmap (each row being a byte), and poking this into the 8 bytes at our screen address. As with the line-drawing routine, this poking is done using EOR logic so the text can be removed by redrawing the same characters, and when we have poked all 8 rows, we are done and the character appears instantly on-screen.
For the colour versions of Elite, the approach is similar, but each character block in screen memory is only 4 pixels wide instead of 8 pixels, so instead of poking the whole character row into memory, we first have to do the left half of the bitmap first (by extracting the high nibble of each row in the bitmap and poking 8 of them into one character block), and then the right half in the next character block along (this time extracting the low nibble of the bitmap). We also have to check whether we are crossing a page boundary, as the four-colour space view has two pages of screen memory for each character row, so the I/O processor's TT26 routine is rather more convoluted, but the approach is broadly the same.
It's a long way from 10 PRINT "Hello world!":GOTO 10, that's for sure...